Stu's 4agte EP71

Start a post and show off your starlets here

Moderator: mods

User avatar
Stu
Admin
Admin
Posts: 5599
Joined: Wed Jul 24, 2002 3:26 pm
Antispam: No
Location: Hiding from you

Re: Stu's 4agte EP71

Post by Stu » Sun Dec 02, 2012 8:44 pm

Work has gone mental (always happens this time of year) so have been burning the candle at both ends which leaves shit all time for anything else. But saying that I got a bit done this weekend which is better than nothing.

Finally rolled a new plenum that I was happy with so trimmed it back to the angle I wanted. Its only a slight rake of about 15mm from one end to the other. So with everything looking ok I welded the runners to the plenum plate, tidied up the ports then welded on the plenum itself.

Here's the ports tidied up and all smoothed out...
Image

Looking down the runner...
Image

Welded...
Image

Its been a looooong time since I've welded ali but its come out not too bad...
Image

Another shot...
Image

I also made up a bracket for the multi coils. Its just an ali bracket that I folded up for now - may need to go stainless in the future. Still a bit to do on it with some gussets to weld on and a tag back to the rocker cover to stop vibration. Will show more photos of this when its all done. Need to cut a slot for the dizzy cable to run though etc yet. Will be trying to hide the wiring as much as possible this time.

With inlet dummy fitted...
Image

Kind shows the coil bracket. Also shows the dizzy blanking plate I got from SQ Engineering - awesome piece of kit...
Image

So this is where its at for now...
Image

Overall...
Image

So next is drilling out and fitting the injector bosses and then figuring out how to bolt down the fuel rail. Will also weld on the throttle body plate and then finalise the intercooler pipe.
Will update again soon

User avatar
Stu
Admin
Admin
Posts: 5599
Joined: Wed Jul 24, 2002 3:26 pm
Antispam: No
Location: Hiding from you

Re: Stu's 4agte EP71

Post by Stu » Thu Nov 14, 2013 6:04 pm

Image

User avatar
Stu
Admin
Admin
Posts: 5599
Joined: Wed Jul 24, 2002 3:26 pm
Antispam: No
Location: Hiding from you

Re: Stu's 4agte EP71

Post by Stu » Sun Jan 05, 2014 10:47 pm

Hmm, quite behind with this. This update is quite disjointed and happened quite a while ago so will try to update again as a fair amount has been done/happening.

So this is kinda where I got to:
Image

Sat the fuel rail in place and set the angles for the boses
Image

Setting the angle
Image

Made up some tabs and dummy bolts to hold the rail in position
Image

Another shot
Image

Welded it all up
Image

Also bought some Links. Later changed to G4+
Image

Moving to the brakes, I had a look around for brake lines and due to the cheapness had a bit of a gamble with a set from Safebrakes. Nice lines and they pass all the required specs says Mr Certman
Image

Ah, but its not plain sailing. When measuring an issue has arisen
The old ones measure...
Image

And the new ones measure...
Image

And the body mounts measure...
Image

But some stainless washers came to the rescue. Just needed a bit of a hone out
Image

And they fitted like this to the lines
Image

And fitted to the body like this
Image

The old lines in the back were a bit of a dick to come off so I delegated the task of removing them to Ryan and his Bluepoint flare nut tool which is better than my Repco branded one - thanks Bro
Image

User avatar
Stu
Admin
Admin
Posts: 5599
Joined: Wed Jul 24, 2002 3:26 pm
Antispam: No
Location: Hiding from you

Re: Stu's 4agte EP71

Post by Stu » Thu Jan 30, 2014 4:46 pm

Relatively boring update:

Ages ago I threw a litre of oil into the gearbox and found there was a really small but incredibly annoying slow leak. I had been avoiding fixing it and being lazy I was harassing my bro Ryan to pull the gearbox out and fix it for me, which he actuall did as a Christmas present (rad). Was so un-motivated to do it so stoked he did. It was luck that I had put a litre of normal gearbox fluid in to check for leaks before putting the redline stuff in. Anyway, the below is mainly all Ryans good work, I was just the cleaning and passing tools guy which was awesome

Ripped the box out leaving the engine in place, stripped it down. I gave the casings a paint strip/wire brush as the original black paint was a bit crappy.
Image

When I originally built this combo I only had an auto dust cover so took the opportunity to make a patch and cover hole. Didn't take any finished photos.
Image

Gave the everything a once over
Image
Image

Also double checked the diff preload, spot on still
Image

Then back together
Image
Image

And then hit it with some engine paint, hides the sins...
Image

So I then refitted the box and and fitted the new suspension, braided brake lines, new sway bar with whiteline bush kit, and refitted the under body brace. Front end drive line is now all done - only item under the car left to do is mod a short section of the exhaust I'm not happy with.

User avatar
Stu
Admin
Admin
Posts: 5599
Joined: Wed Jul 24, 2002 3:26 pm
Antispam: No
Location: Hiding from you

Re: Stu's 4agte EP71

Post by Stu » Wed Apr 23, 2014 10:14 pm

Shit, another 4 months between updates. Where to start?

So I sold my Bilstein adjustable platforms (sad day after years of faithful service) and got some new stuff custom made. Few changes to suit what I wanted - bit of a mission to get them but got there in the end.
Image
Image

Wasn't happy with the top hats so drew up some new ones more in line with what I wanted, had them water cut and powdercoated
Image

Drilled out the holes and set some new studs
Image
Image
Image

Slammed them in just to get the car rolling again. Also picked up some genuine 14inch Work Equip 03's. They came with some 60 series tyres which were way too balloony and the car had to sit quite high to for them to clear the guards etc
Image

Had a play with a set of 185/45s and while they looked awesome, to make the fitment look good I needed to lower the car quite a bit which left about 40mm of ground clearance to the lowest point (sway bar mounts) which is fairly ridiculous.
Image

So fitted some 55s and while they are not as cool as the 45s they looked way way better than the 60s
Image

Just for a laugh I fitted the old 17's - hadn't mucked with the height much at this point
Image

Quite like the look of the front, needs a bit more low and some guard work but getting there
Image

Have posted this before but this was the car before the next stage of suspension mods
Image

User avatar
Stu
Admin
Admin
Posts: 5599
Joined: Wed Jul 24, 2002 3:26 pm
Antispam: No
Location: Hiding from you

Re: Stu's 4agte EP71

Post by Stu » Wed Apr 23, 2014 10:38 pm

So yeah to explain why I did the next bit...
With most EP suspension to get the rear nice and low you have to run most struts at max low or very close to it. I'd had the new suspension made specifically with this in mind but there is a limit on how short the shock can actually be. Anyway long story cut short, I wanted to be able to get the car nice and low and still retain plenty of scope of the shocks/shock range.

Kris dropped in to help/laugh so we broke out the marker pen...
Image

Choppy choppy
Image

Had some plates cut and some pipe so tacked these in
Image

Bit of welding - the strut towers are actually made up of multiple thickness of steel so I welded them inside to the inner skin and outside to the outer one for max strength
Image

Made up some tabs for the rear strut brace
Image

Seam sealed, etch primed then painted
Image

Since this I've refitted all the rear trim and strut covers along with the seats that still lock into position as per standard. Will get a photo or two of this when I get a chance.

With the new low I also rolled the guards to aid clearance.
Image

This isn't max low, but whats happening now is as the suspension is lower the arc from the trailing arms is actually bringing the wheel forward in the arch. Eventually I'll make up some custom adjustable arms so the beam can be moved back again dependant on height - one day down the track
Image

Here's the difference with the guards rolled - full range of suspension movement and no rubbing at all (aided by the adjustable panhard I made up ages ago)
Pretty happy how it came out - and these are 205's not 195's too
Image
Image

Need to decide if the mud flaps stay or go - they do look a bit silly when its low
Image

At some stage when I have time I'll lower it as far as it will go for a laugh.
That will do for now folks

User avatar
Stu
Admin
Admin
Posts: 5599
Joined: Wed Jul 24, 2002 3:26 pm
Antispam: No
Location: Hiding from you

Re: Stu's 4agte EP71

Post by Stu » Wed Sep 03, 2014 1:18 pm

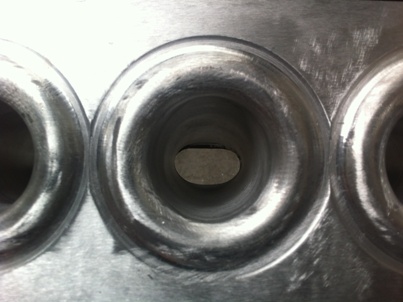
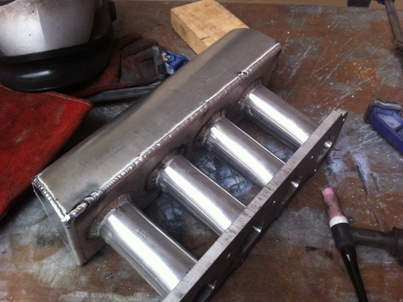
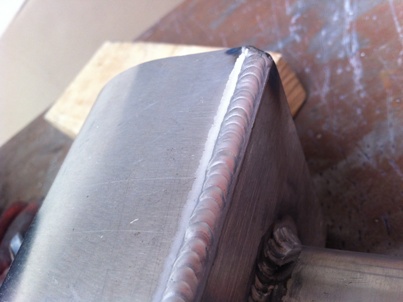
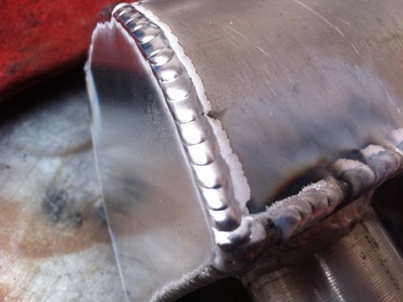
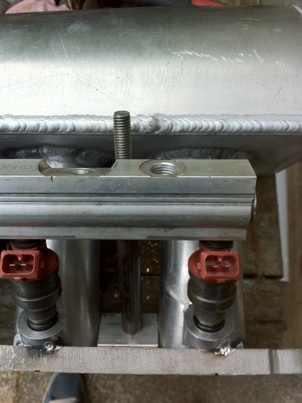
So have shifted back to working on the engine again. I hadn't quite finished off the inlet manifold so I spent a few hours with the dremel cleaning up the welds around the injector ports inside the runners.

Image

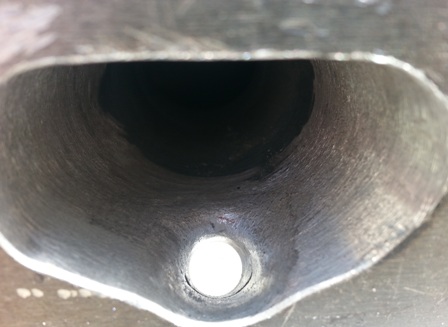
Shaped them all with the carbide bit so they looked like the above then swapped the bit to a sanding drum and tidied them up. Also welded a plate onto the underside and drill and tapped the NPT hose fittings for the brake booster and vac line take offs.

Image

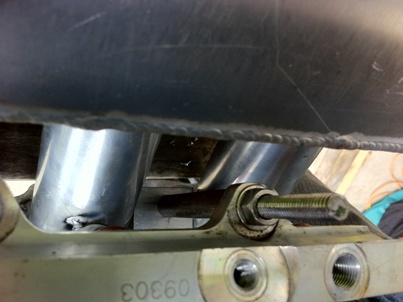
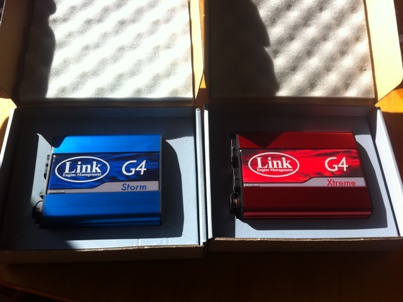
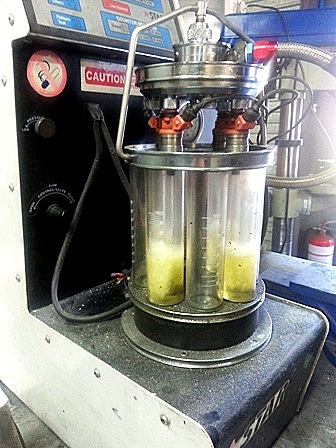
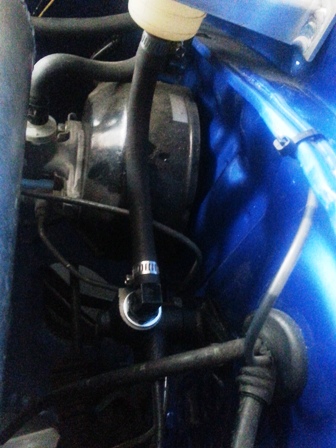
Then finalised the mounting of the idle speed controller. This is a two wire PWM bosch unit and will be controlled via the link to handle cold start idle up and load rpm adjustments (for headlight/alternator load etc) along with being the air bypass for antilag.

Image

I ran a similar setup on the old engine via the old Linkplus but with the G4+ the control is quite alot nicer. I wont have any of the issues of un-even idle or difficult starting that I'd seen with quite a few customers cars that have come thru. Should be able to adjust idle quite accurately and also have progressive warm up idle speed adjustment like factory.

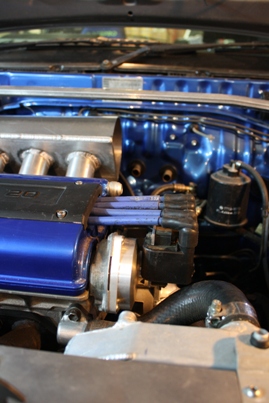
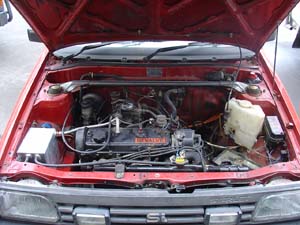
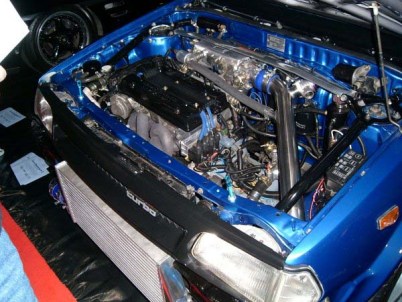
Here's a photo of the old setup - will retain the same bypass piping to the intercooler pipe.
Image

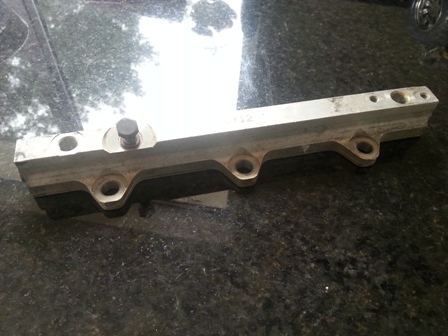
I was never very happy with using a stock 4age fuel rail as it had an extra mount that I wasn't going to use and the top mount reg and feed which I was going to have to fill and machine back.

Image

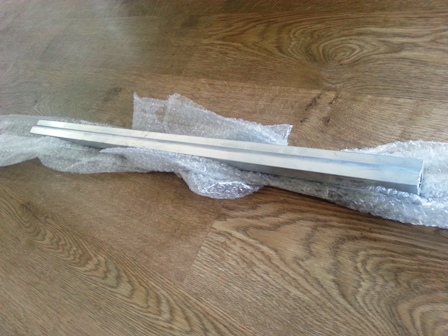
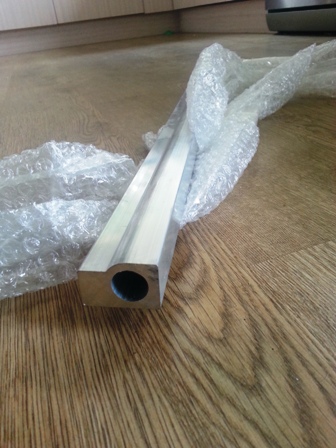
So, I bought some Aeroflow fuel rail extrusion and started to make my own fuel rail. I was thinking about centre feeding this with returns from both ends hooking down to the fuel pressure reg that I would mount under the inlet somewhere but in the end I decided this was overkill and end feeding was fine.

Stock rail
Image

Aeroflow extrusion
Image
Image

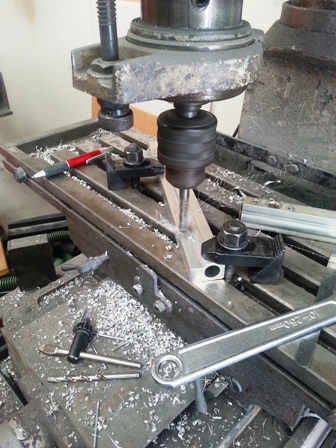
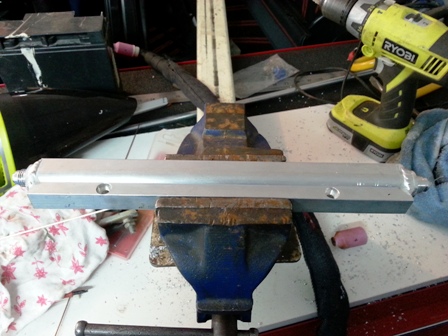
Chopped then rail to length, then used the milling machine to drill holes for the M5 mounting bolts. Then used a 10mm milling bit to recess the cap screws into the rail so the heads sit flush - trying to make it look tidy.

Image

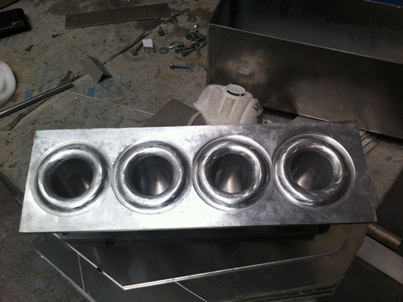
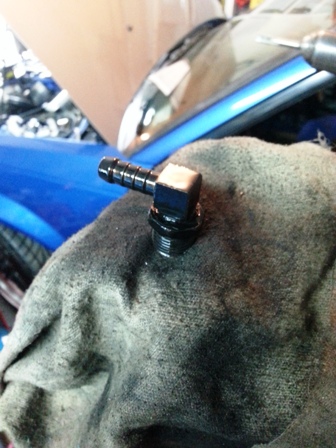
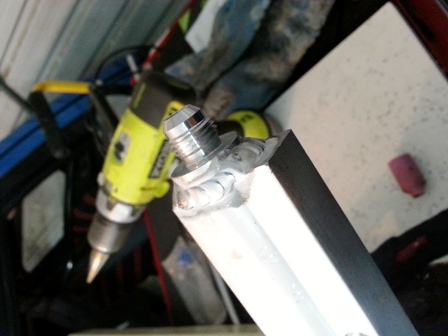
Reamed the ends to allow the aeroflow -6 weld on fitting to slide inside the rail
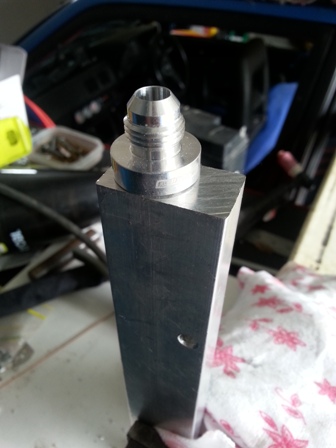
Image
Image

Then welded them on
Image

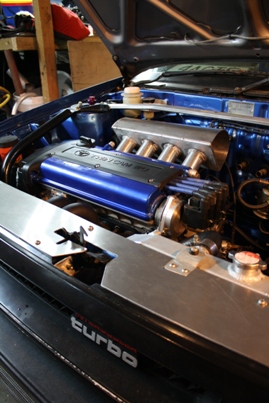
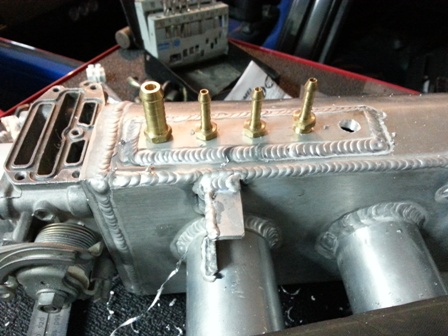
So it looks like this
Image

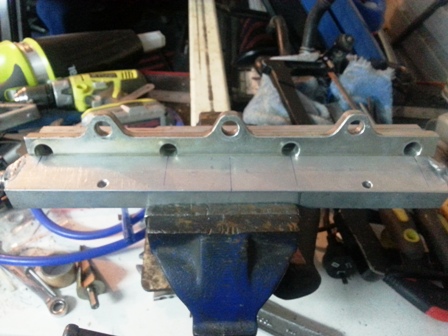
Copied across and drilled the injector ports
Image

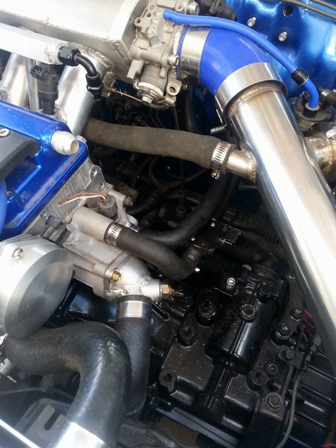
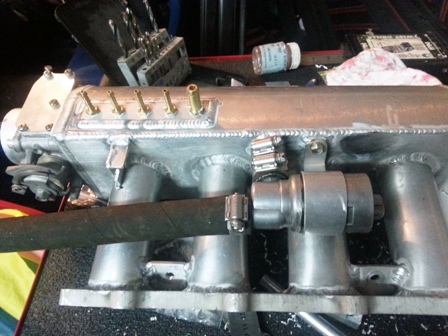
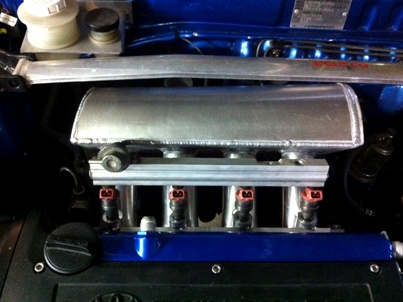
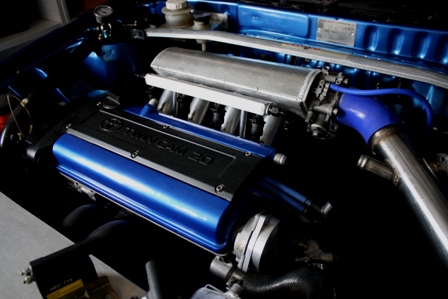
Sat it all in place and measured up the spacers needed to bolt the rail to the inlet (already had tabs between the runners from fitting the stock rail). You can see the throttle cable bracket welded under the plenum, you can hardly see the cable so its quite tidy. Still need to trim the length of the idle speed controllers bypass hose.
Image

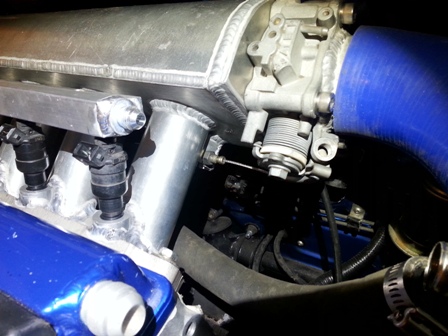
You can see the idle speed controller under the inlet
Image

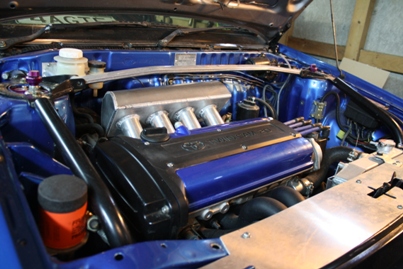
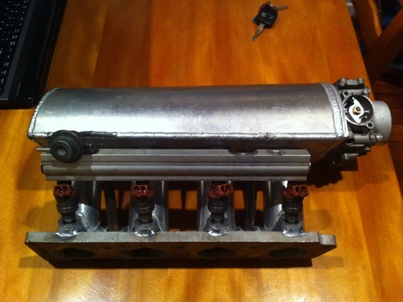
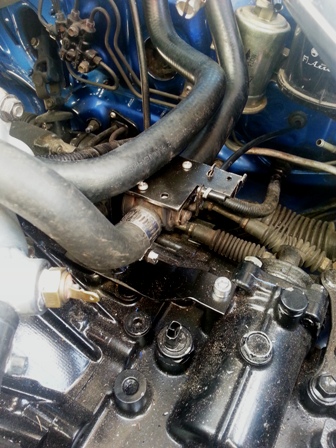
Chopped the fuel rail spacers then drilled/tapped each end and fitted them. The rail is rock solid - fingers crossed there are no leaks. I've started buying the fuel rail fittings but need to mount the fuel pressure reg before finalizing the final fittings and pipe I need. Will be using stock piping from the 044 pump to the fuel filter on the fire wall, then -6 fittings and line from there to the rail > reg > return. If I looks like the stock fuel line will be a restriction then I'll change it but I'm hoping to get away with it.
Image

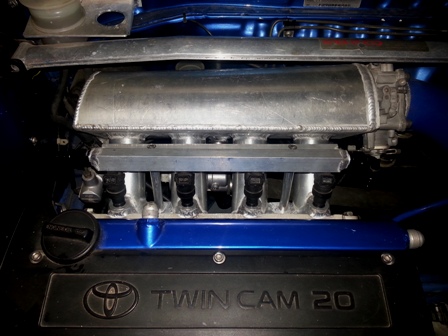
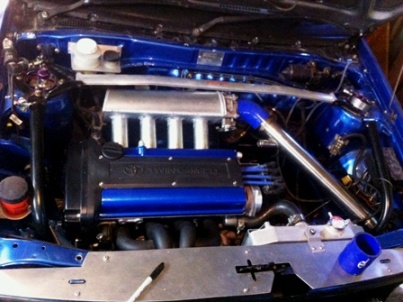
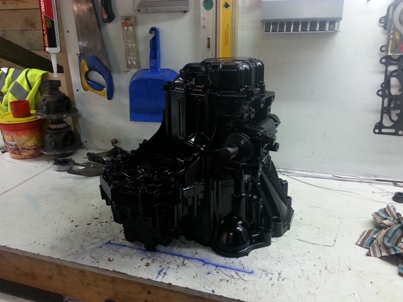
So this is where its at now. Next is mount the fuel reg, fit the fuel pressure sensor for the Link, and make up the lines - then the fueling side is all done.
Image

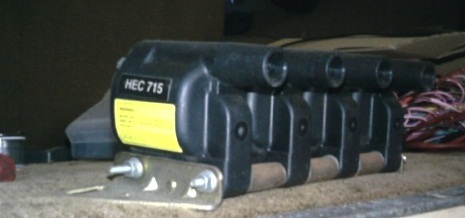
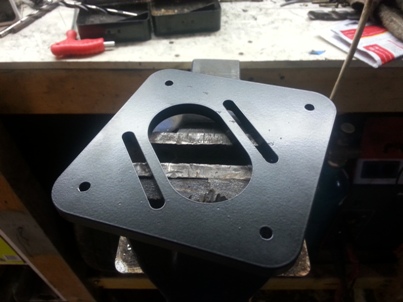
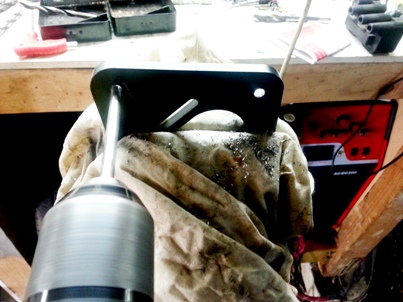
I've started to design the mount for the HEC715 coils, just need to decided on the final spot (somewhere over the gearbox probably) and the Link ignitor mounting location. Will mount the coils like this probably.
Image

User avatar
Stu
Admin
Admin
Posts: 5599
Joined: Wed Jul 24, 2002 3:26 pm
Antispam: No
Location: Hiding from you

Re: Stu's 4agte EP71

Post by Stu » Wed Sep 03, 2014 1:32 pm

Oh, forgot to add, I had the injectors for Garreths car tested the other week prior to tuning so this week I took mine down for the same treatment. Im using some 760cc Siemens units which should do the trick. Here's a photo of Garreths getting flow tested - didn't get a photo of mine being done as I just dropped them off this time. Money well spent making sure they're spot on.
Image

User avatar
Stu
Admin
Admin
Posts: 5599
Joined: Wed Jul 24, 2002 3:26 pm
Antispam: No
Location: Hiding from you

Re: Stu's 4agte EP71

Post by Stu » Mon Sep 29, 2014 9:18 pm

Shit/boring update but still heading in the right direction. Inlet is all on for the final time I hope. Just before I refitted it I took the opportunity to replace the clutch master.

Obligatory photo
Image

Wasn't going to use the standard reservoir so took that off and welded up the fitting so I could drill and tap it to suit a 1/8NPT elbow fitting. It got nice and toasty when I welded it.
Image

Some matte black paint to make it looks less shit
Image

Done
Image

I hate engine conversions that don't have heater hoses - seems such a cop out to not sort them out. The stock EP71 heater lines run via a control valve mounted on a bracket high on the firewall - its pretty gay. In my case it hits the intercooler pipe and throttle body. The stock control valve is a right angle which is a right pain in the vag but I managed to find a straight unit from pick a part so made a bracket off the gearbox and made up some lines from bits of pipe I had laying around. Also moved the control cable which was by far the shittiest job lately - needed to take the heater box out etc. Anyway, photos as you all hate text I can tell...

Stock heater lines can just be seen kinda
Image

And here's my version
Image
Image

Have also done quite a bit on the coils, but no photos /lazy

User avatar
Stu
Admin
Admin
Posts: 5599
Joined: Wed Jul 24, 2002 3:26 pm
Antispam: No
Location: Hiding from you

Re: Stu's 4agte EP71

Post by Stu » Fri Oct 31, 2014 12:00 am

Lazy picture-less update.

Currently balls deep in wiring this bitch - about half way thru so all going well another week and I should be powering up the ecu. Have redone the battery mounting in the boot, feeds via isolator, charge circuit, uprated fuel pump relay/wiring and currently working on the uprated coil +ve feed. Have had the main chassis stuff powered up - all works except the tail lights are out by the looks - have a vague memory of stealing the bulbs out of it at some stage so will check that.

Finished the fuel side of things then when checking the 044 pump realised its shagged (from sitting so long no doubt) so had to buy another one - it was a cost I didn't need. Tank out to refit, back in and tested it to 65psi so far. Had one injector o ring weep a bit of fuel so will replace them all before doing a 90psi test (not that is should ever need to get that high). Forgot how freakin loud the 044's are but at 700hp capable its worth the extra fitment aggravation/noise. Ignitors are mounted, coils are mounted.

Had heaps of other distractions lately - currently working on a AE111 4agte that I wired up a while back, a AE92 Levin I wired with a Blacktop, and a EP82 that I'm doing a COP and a few other upgrades on.

Pictures later

Ta ta for now

User avatar
Stu
Admin
Admin
Posts: 5599
Joined: Wed Jul 24, 2002 3:26 pm
Antispam: No
Location: Hiding from you

Re: Stu's 4agte EP71

Post by Stu » Thu Nov 13, 2014 3:23 pm

Have cleared the decks a bit with only two projects here now (EP82 and AE92) although a EL31 4efte loom conversion is due to turn up shortly which will tie me up for a day or two. Everyone loves photos so here's a couple of the recent cars:

AE111 Blacktop 4agte - Wired in a Link G4 Storm, got running and street tune. Owner needs to sort some stuff before bringing it back for a proper tune. Should be a strong setup once is all finished.
Image

AE101 Wagon Blacktop 4agte TDO6-20g - Firmware upgrade from Link G3 to G4, setup high/low boost and antilag/cyclic idle switch, tidied up the Link idle control which works brilliantly now, quick street tune check to 12psi, goes well.
Image
Image

Most of the way through the wiring on my car now, taking time to get everything they way I want it. Still a few things I'd change given more time but have some pressure on to get it running.
Image

User avatar
Stu
Admin
Admin
Posts: 5599
Joined: Wed Jul 24, 2002 3:26 pm
Antispam: No
Location: Hiding from you

Re: Stu's 4agte EP71

Post by Stu » Mon Dec 15, 2014 12:55 pm

Image

User avatar
Stu
Admin
Admin
Posts: 5599
Joined: Wed Jul 24, 2002 3:26 pm
Antispam: No
Location: Hiding from you

Re: Stu's 4agte EP71

Post by Stu » Tue Jan 06, 2015 8:52 pm

So yeah, this thing is running now. Got it started after some trial and error (errors on my behalf). Got some basic tuning done with the help of my co-pilot KPR and ran it in a bit at 6psi and 8000rpm. Not alot of timing dialed in so there's a bit to go. Did 60kms or so of run in and nothing blew up majorly (except having to raise the car and the tps falling off), so dumped the oil then took it to the oldschool drag day at Meremere for a hiding. Took a bit to remember how to drive (was I ever any good?) but managed a 14.01 @ 104mph which isn't too bad considering I was rusty/useless. Definitely a 13 in it without touching the boost - need to a) learn to drive it (less rape spec launches), b)setup the suspension better and give it more than a eyetrometer alignment, dial in more timing. Felt really soft in the higher gears and subsequently when driving it around its developed a miss from 6000rpm so there's still some fettling to do. Will swap in the bigger wastegate spring once the miss is sorted.

Image

Now its running obligatory thanks go to the following people:
- KPR (advice, motivation, abuse)
- FINX (doer of shit jobs, advice, abuse)
- Brendan @ Convert Motorports (advice, abuse)

Image

Image

Image

Image

User avatar
Stu
Admin
Admin
Posts: 5599
Joined: Wed Jul 24, 2002 3:26 pm
Antispam: No
Location: Hiding from you

Re: Stu's 4agte EP71

Post by Stu » Tue Jan 13, 2015 8:14 pm

Ok here is a run from this afternoon - 1st gear through to nearly the top of 4th ~ 7700rpm before backing out (should really try and work out how fast it was)
Air temps started at 21 degrees and peaked at 27 degrees which I think is pretty good for a hot day although don't have any other logs to compare it against.

Image

Figured out why it was feeling soft up top and its happily winds to the 8500 limiter now. Still needs lots more timing so more to come. Will swap in the larger wastegate spring tomorrow all going well.

User avatar
Stu
Admin
Admin
Posts: 5599
Joined: Wed Jul 24, 2002 3:26 pm
Antispam: No
Location: Hiding from you

Re: Stu's 4agte EP71

Post by Stu » Mon Jan 26, 2015 11:17 am

2015 Nationals over for another year.

Pretty average results but a great day out all the same. Got 5 or so runs in before giving up and parking it up - plagued all day with very annoying missfires and a random trigger error which is likely due to the cam angle sensor so will be replacing that and trying again. Best run was 14.33@101.51mph at 14psi which is a way off where it should have been. As a comparison it ran the 14.01@104mph prior to christmas with 6psi, a whole heap less timing and on a un-prepped track.

Huge thanks to Ryan who setup all the suspension/heights, bullied me into making a side pipe, general setup and towing duties - much appreciated bro!! Keep winding me up for motivation and will get there in the end. Also huge thanks to Kris who took a day off to tune prior to the nats. Very frustrating that it was driving so well on the street only two days before and looking so promising. Oh well that's racing and there's always another event.

Image

User avatar
Stu
Admin
Admin
Posts: 5599
Joined: Wed Jul 24, 2002 3:26 pm
Antispam: No
Location: Hiding from you

Re: Stu's 4agte EP71

Post by Stu » Sat Jan 31, 2015 8:27 pm

Found this photo - pretty cool

Image

User avatar
willhouse
4 psi - Factory low boost
Posts: 7
Joined: Thu Mar 28, 2013 7:22 pm
Antispam: No

Re: Stu's 4agte EP71

Post by willhouse » Sun Feb 01, 2015 7:13 am

Stu, you made Speedhunters too!

"For many of those who compete, the opportunity to be a part of the annual event is all of the incentive needed to create something unique. Regardless of the motivation to build outside of the box, this little side-piped EP Toyota Starlet was pretty cool, and certainly not slow."

http://www.speedhunters.com/2015/01/4-a ... ag-racing/

Image
Image

User avatar
Stu
Admin
Admin
Posts: 5599
Joined: Wed Jul 24, 2002 3:26 pm
Antispam: No
Location: Hiding from you

Re: Stu's 4agte EP71

Post by Stu » Sun Feb 01, 2015 10:21 am

That's pretty cool! Thanks for posting it up. Brad took some photos of the car in the pits as well but didn't think any would make it to the actual speedhunters page.

User avatar
Stu
Admin
Admin
Posts: 5599
Joined: Wed Jul 24, 2002 3:26 pm
Antispam: No
Location: Hiding from you

Re: Stu's 4agte EP71

Post by Stu » Mon Feb 23, 2015 7:55 pm

Image

Image

User avatar
Stu
Admin
Admin
Posts: 5599
Joined: Wed Jul 24, 2002 3:26 pm
Antispam: No
Location: Hiding from you

Re: Stu's 4agte EP71

Post by Stu » Sun Jul 26, 2015 7:17 pm

Took the heap out for a burn today and to test the new rpm limit settings. Gave it absolute death and it didn't miss a beat - win.

Photo from a few weeks back
Image

Post Reply