Stu's 4agte EP71

Start a post and show off your starlets here

Moderator: mods

User avatar
Stu
Admin
Admin
Posts: 5599
Joined: Wed Jul 24, 2002 3:26 pm
Antispam: No
Location: Hiding from you

Re: Stu's 4agte EP71

Post by Stu » Sun Jul 25, 2010 11:08 am

I spent alot of time researching a possible replacement clutch setup. Off the shelf there wasn't anything available that I could find that would handle the power. I went in and spoke to Autoclutch and they were unable to make another clutch with more clamp pressure than the original (the pressure plates start to bend with any more clamp) so was starting to look at having to fork out for a twin plate setup when I managed to track down an Exedy setup from Exedy Racing in Japan. This clutch isn't to be confused with the Exedy Australia clutches that are not built as well. Its pretty much the last option before going to a twinplate unless Autoclutch come up with some new technology.

Image
Balanced and skimmed flywheel

Image
Clutch plate - note bonded surfaces not riveted

Image
Pressure plate - quite a bit beefier than the old one and a bit more clamp pressure

So fitted this and then one weekend went out to an open day at Pukekohe. It was pissing down with rain but had a ball thrashing around the track. The car is very fast on the back straight but was struggling with traction due to the rain and the road tyres. The clutch held really well and felt very positive even when loaded right up.

But, had a bit of a problem pop up after a couple of hours. Was heading through the sweeper and into Caltex when I noticed the oil pressure starting to drop off. Buttoned right off and cruised down the back straight and the pressure stabilised but as soon as I put the power back on the oil pressure wouldn't build up and was starting to drop. After the hair pin I buttoned right off and idled into the pits. I suspected that a bearing was about to spin so loaded the car back onto the trailer and called it a day.

I think that the oil level may have been a touch low and/or I was getting oil surge when going through the corners which may have caused a bearing to fail...

User avatar
Stu
Admin
Admin
Posts: 5599
Joined: Wed Jul 24, 2002 3:26 pm
Antispam: No
Location: Hiding from you

Re: Stu's 4agte EP71

Post by Stu » Sun Jul 25, 2010 11:18 am

For a while previous to this I had been getting a few bits and pieces together and was building up a spare engine (no photos of this). So I pulled the original engine out and starting getting things sorted for a new setup.

Image
Bought a TRD head gasket

Image
And one of these

Image\
And did a bit of this to it

User avatar
Stu
Admin
Admin
Posts: 5599
Joined: Wed Jul 24, 2002 3:26 pm
Antispam: No
Location: Hiding from you

Re: Stu's 4agte EP71

Post by Stu » Sun Jul 25, 2010 12:14 pm

Image
Engine out

While everything was out I decided to check the box and much around with different gear sets

EDIT: Also changed the flywheel for a mean lightweight one.

Image
Strip down

Image
Gearset

Image
Still clean inside

Image
Back together and primered up

Was also putting the engine togther...

Image
Bottom end all done

Image
Head all done and on. New valve springs, seats, retainers, shims etc

Image
Coming together

Image
Engine good to go

Image
Other side

Image
Ready to go

Image
Lifting

Image
Bolted in

Image
Done

Image
Engine bay

User avatar
Stu
Admin
Admin
Posts: 5599
Joined: Wed Jul 24, 2002 3:26 pm
Antispam: No
Location: Hiding from you

Re: Stu's 4agte EP71

Post by Stu » Mon Jul 26, 2010 7:53 pm

Grabbed one of those underbody braces from AAP (free plug). Had to beat it up a bit and cut some stuff out of it to make it fit.

Image

User avatar
Stu
Admin
Admin
Posts: 5599
Joined: Wed Jul 24, 2002 3:26 pm
Antispam: No
Location: Hiding from you

Re: Stu's 4agte EP71

Post by Stu » Sat Jan 22, 2011 12:10 pm

Started on the new exhaust manifold as with the new head there is one bolt to the head thats in a different location so it was a good excuse. Also took the opertunity to rotate the turbo around so the exhaust exits on the conventional side (towards the gearbox).

Started by getting new flanges laser cut and then tacking up the centre two runners.
Image

90 degree and 180 degree bends were perfect
Image

Shows the turbo propped in position by a jack and the first two runners
Image

First two tacked and roughly where the runners will go
Image

And a rough design of how the collector will work
Image

Test fit
Image

User avatar
Stu
Admin
Admin
Posts: 5599
Joined: Wed Jul 24, 2002 3:26 pm
Antispam: No
Location: Hiding from you

Re: Stu's 4agte EP71

Post by Stu » Sat Jan 22, 2011 7:56 pm

All tacked together and test fitted again
Image

In the process of welding it all up
Image
Image

Test fitted and external mounted. This was a bit of a mission but I'm very happy with the final outcome and how the merge into the drop pipe worked out.
Image

Sand blasted the manifold and drop pipe (thanks Brendan), then painted with 3M High Temp paint.
Image
Image
Image

And all fitted with new gaskets
Image

I've also added an exhaust hanger bracket off the rear engine mount that will help avoid any movement in the exhaust. There is very little space between the sway bar and the engine mount and I used to get the occasional knock with the old setup.

User avatar
Stu
Admin
Admin
Posts: 5599
Joined: Wed Jul 24, 2002 3:26 pm
Antispam: No
Location: Hiding from you

Re: Stu's 4agte EP71

Post by Stu » Fri Jan 28, 2011 8:41 pm

More good progress...

I've always wanted to remake the alternator mount so it sits tighter to the block and in a better position. I bought some more steel during the week and made up a new mount which sits higher and alot tighter. I still need to get a belt thats the right size after which I can reduce down the length of the adjuster arm. This mount also negates the need for a idler bearing which I was using previously.

Dummied it up on the spare engine which made the job way easier.

Image

Getting the belt straight is critical

Image

Also modified the alternator a bit so it would swing in a bit further - aka grinder and file

Image

End on shot, ignore the belt, was just dummy fitting without a water pump. I will eventually look at changing the alternator pulley for an underdrive alloy one.

Image

I also finished off the drop pipe and painted it up in high temp paint. Still considering if I will re-wrap it like the old one or just leave it as is.

Image

Also painted up the alternator mount - matt black for the win

Image

Fitted into place, just need the right belt now.

Image

And dummied up the new radiator. Might end up moving the bottom hose but its a pretty good fit and came up at a good price. Should do the job easily. Will mount on the davies craig fan I have - will have one spare as ran two last time.

Image

Discussion here bitches - viewtopic.php?f=26&t=11091

User avatar
Stu
Admin
Admin
Posts: 5599
Joined: Wed Jul 24, 2002 3:26 pm
Antispam: No
Location: Hiding from you

Re: Stu's 4agte EP71

Post by Stu » Fri Feb 04, 2011 5:21 pm

Well its not much of an update with a few steps back before going forward today. Got into a few annoying small jobs that I've been putting off.

Here's another side on pic of the radiator dummied up

Image

Anyway, needed to modify the front wiring loom for the head lights and the alternator loom as the new manifold is too close to the top cross member under which the wires normally run. So pulled all the wires back, extended and re-routed to run across the lower cross member.

Image

Got that done and went and got a fan belt the right size. Fitted it and then modified the intercooler piping from the turbo to fit. Picked up a new 90 degree bend from Alaric @ Driven Performance (free plug).

Image

Also made the radiator mounts - here's the top one

Image

And the two bottom ones - bung angle but its hard to take photos from underneath the car

Image

Then chucked everything back together temporarily - kind looks like a car again

Image

Did abit of tidying up and designed up a few bits and pieces. Next on the agenda is to drop the steering rack to get modified and then pull the shafts to replace the cv boots and regrease everything.

User avatar
Stu
Admin
Admin
Posts: 5599
Joined: Wed Jul 24, 2002 3:26 pm
Antispam: No
Location: Hiding from you

Re: Stu's 4agte EP71

Post by Stu » Fri Feb 11, 2011 7:29 pm

Another Friday update...

The plan was to get the shafts out to replace the CV boots and check all the knuckles etc are ok. Got covered in shitty CV grease in the process and got halfway through before realising I've run out of hand cleaner... fuck!! :D

Anyway, I stole my brothers (finx - cheers geezer) rattle gun to undo the king nuts on the end of the shafts half expecting them to be frozen solid and unmovable like most of them are. In the end they spun off with almost no rattles which pissed me off a bit as I should have just tried with the spanner rather than driving all the way out to see Ryan and then back again later to return the rattle gun - you live and learn :D

So here's the shafts out and on the bench. One of the boots was split and another looked a bit old and slightly perished hence just replacing them all.

Image

Started pulling the clips off and remembered why I hate CV's...

Image

:arrow: If you want to know how to change the boots then the next few photos are a good guide...

On the inner coupling (gearbox end of shaft) the knuckle is held on by a circlip which you need to remove

Image

Here its off and starting to slide the knuckle off

Image

And its off and the old boots then slide off

Image

I was going to rip the hub end off to check the tollerances but they turned out to be in good condition so just cleaned them up to repack with new clean grease.

Image

Washed everything down with petrol and started reassembly

Image

All back together - new boots, new grease, new metal clips

Image

Then got into the other shaft - same principle except for the additional balancer to be removed

Image

All done

Image

Threw the shafts back in and pulled the rack out while I was there. Got a few mods to try on this and also replace the boots.

Image

Racks out and stripped. Will be re-greasing it while its appart.

Image

Thats it really - racks still on the bench while I try a few things. May look at the brakes next while I'm waiting for a few bits to be machined.

viewtopic.php?f=26&t=11091&p=91985#p91985

User avatar
Stu
Admin
Admin
Posts: 5599
Joined: Wed Jul 24, 2002 3:26 pm
Antispam: No
Location: Hiding from you

Re: Stu's 4agte EP71

Post by Stu » Sat Mar 05, 2011 7:07 pm

Not alot of progress worth mentioning other than I've finished playing with the steering rack and its now back in the car for good (hopefully). Only had to remove/reinstall and give the car an alignment 3 times to get it right... Don't ask me to ever help removing/installing steering racks as a punch in the face often offends. Actually doing alignments without a hoist probably sucks balls the most. Next house I buy is gunna have a big arse barn that a hoist can fit in.

Anyway.. photos else the post is boring. Here's the rack all done with new boots yadda yadda
Image

And the compulsory lay on the ground to get a poser photo photo...
Image

And another...
Image

I've also lowered it a bit more. Next time I can be bothered I'll lower the back another 20mm then level the front and see how it looks. Its pretty freakin low now so when its really slammed it'll skim cats eyes off the road for sure.

Actually with the lowering the stock panhard is being an ass so I've ripped it out to make the bitch adjustable which I'll probably do tomorrow. Will jig these up so I can do other peoples panhards (EP71, EP82 and probably EP91 too) so hit me up if your interested.

Image

Till next time

User avatar
Stu
Admin
Admin
Posts: 5599
Joined: Wed Jul 24, 2002 3:26 pm
Antispam: No
Location: Hiding from you

Re: Stu's 4agte EP71

Post by Stu » Mon Mar 07, 2011 7:57 pm

Sweet - I tig welded up the panhard tonight and its looking good. Gunna sand blast it and then paint it black so will put some photos up when its done. They're centre adjustable rather than rose jointed which means it doesn't need to be taken off the car to be adjusted - bonus.

No pic no post...
Image

User avatar
Stu
Admin
Admin
Posts: 5599
Joined: Wed Jul 24, 2002 3:26 pm
Antispam: No
Location: Hiding from you

Re: Stu's 4agte EP71

Post by Stu » Thu Mar 10, 2011 8:49 pm

Fap fap

Image

You know you want one

User avatar
Stu
Admin
Admin
Posts: 5599
Joined: Wed Jul 24, 2002 3:26 pm
Antispam: No
Location: Hiding from you

Re: Stu's 4agte EP71

Post by Stu » Sat Jul 30, 2011 2:37 pm

Bugger all happening of late, new job means more stress and mega hours plus family commitments means bugger all time in the garage. Had a few cashy jobs through: UWNAGO's 5efte EP82 and Garreths 5efte EP82 amongst others. Ripped the rear struts out of my car for more lowness mods and have basically rebuilt the exahust so it sits more snug to the body and routes over the rear beam axle better - which in turn means more low.

Quite like this idea so might sell all my wheels to fund a deposit on a new set...
Image

User avatar
Stu
Admin
Admin
Posts: 5599
Joined: Wed Jul 24, 2002 3:26 pm
Antispam: No
Location: Hiding from you

Re: Stu's 4agte EP71

Post by Stu » Tue Jan 17, 2012 12:53 pm

Whats this?! An update!?

Well yeah so I have actually been doing stuff but just small amounts and have been too busy/lazy to update this. I've been crazy distracted with other peoples cars (had 14 cars through) as well as working on the house alot, being distracted at work (new job last year replacing the GM - responsibility sucks). The below is way out of order but meh

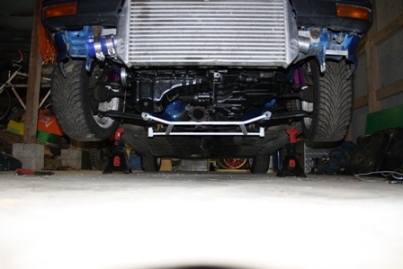
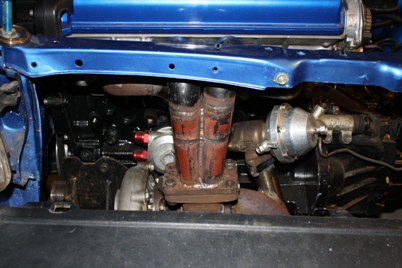
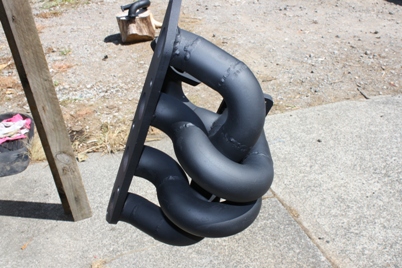
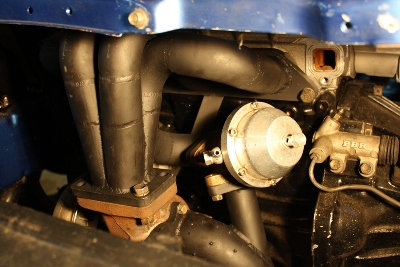
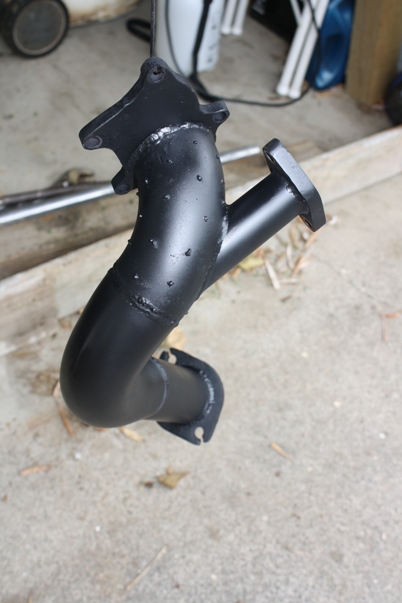
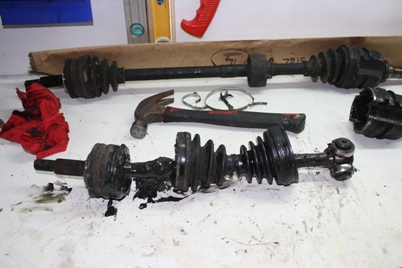
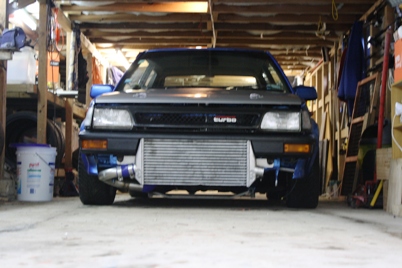
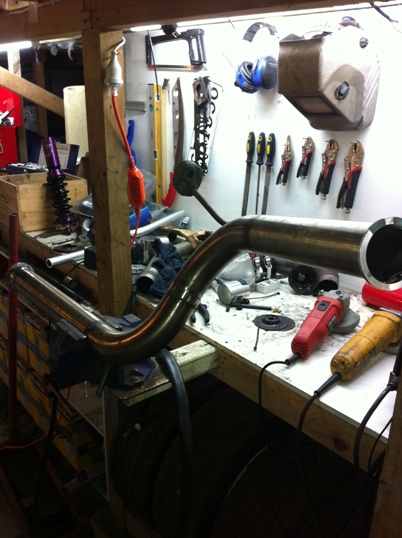
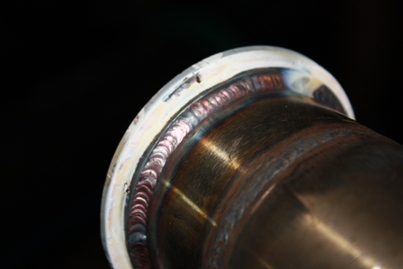
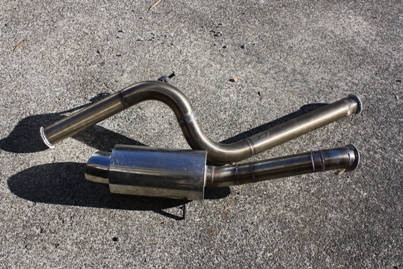
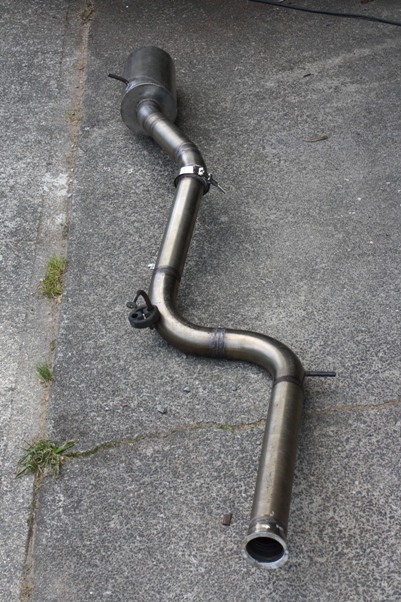
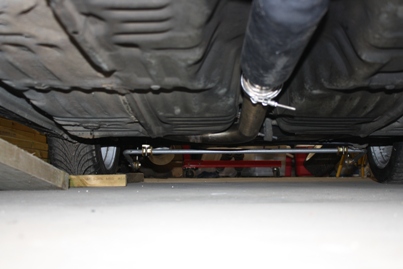
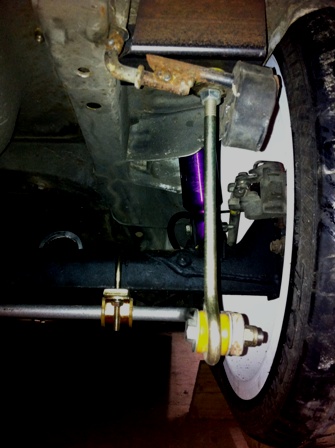
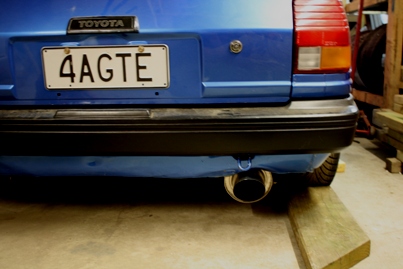
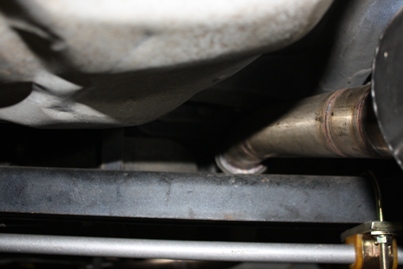
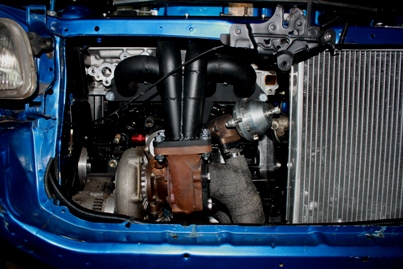
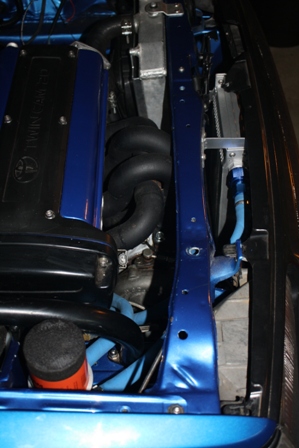
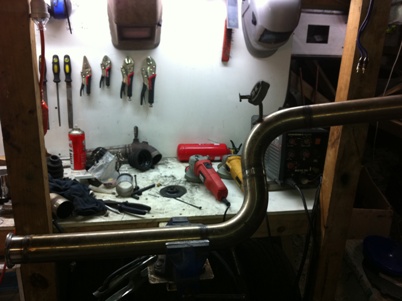
So I got the adjustable panhard fitted and then bacially rebuilt the exhaust from the turbo back to get it tighter to the floor. Used v-bands this time too. Still have the muffler to remount but got distracted with modifying the struts for more low. Done that and I can go almost as low as its possible now.

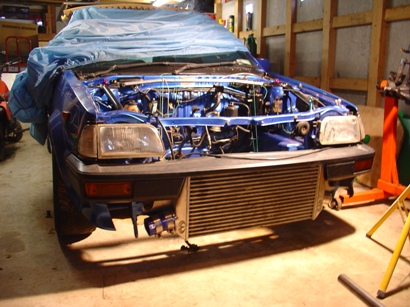
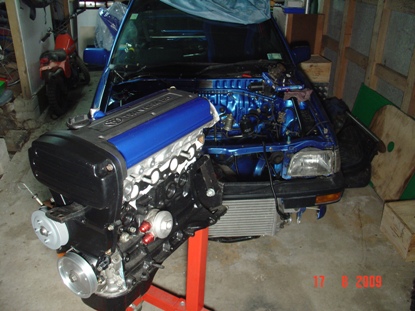
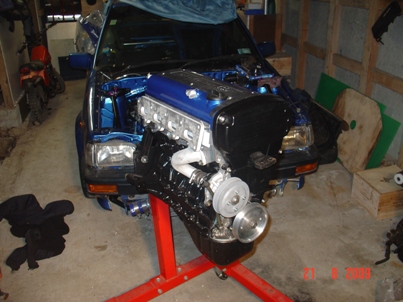
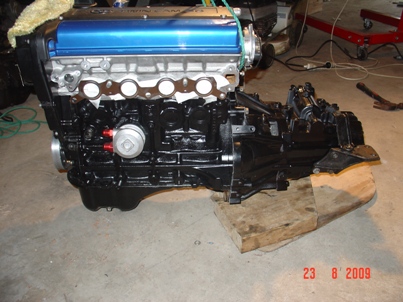
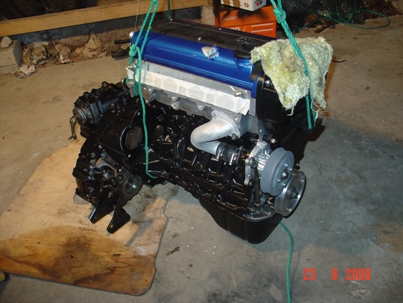
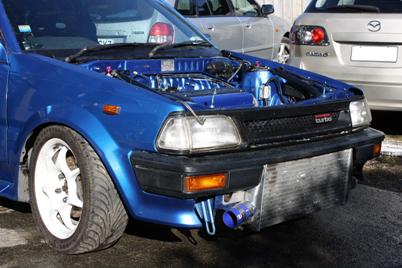
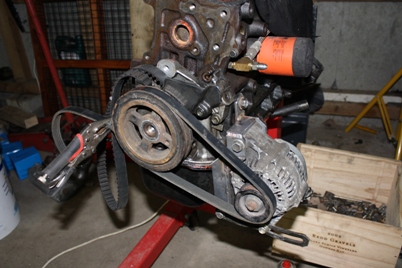
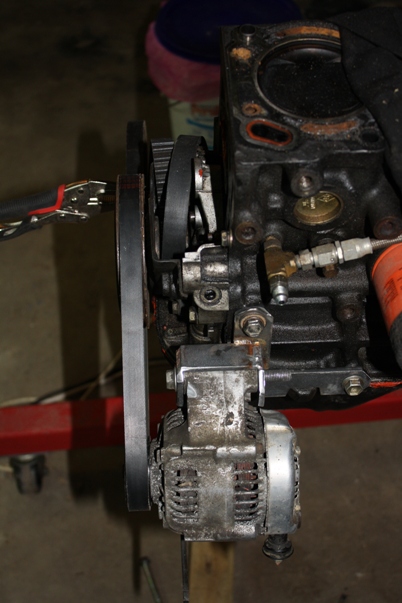
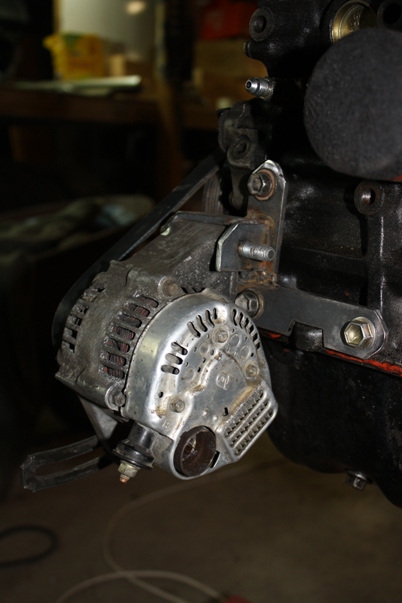
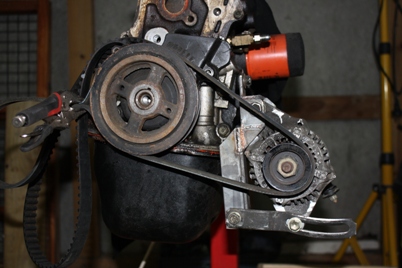
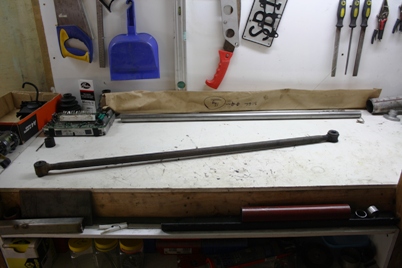
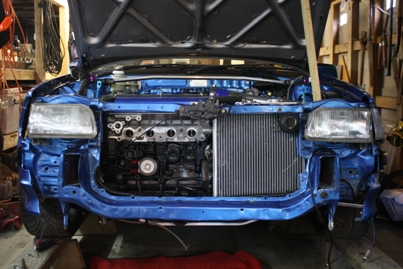
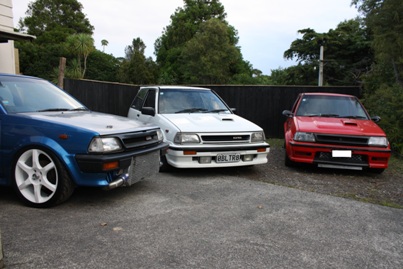
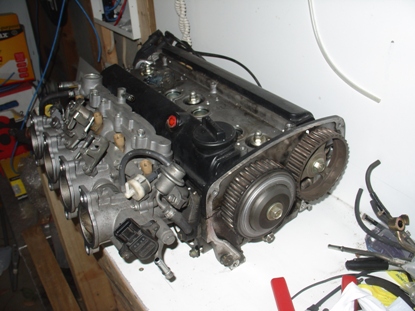
So here's one of the distractions sitting next to Ryans piece... Polys 3et which I've installed a link into and given a short road tune, will go on the dyno very shortly. Cool setup and very nice engine build. Check out the wide arches!
Image

So yeah as I was saying, rebuilt the whole exhaust - this is the only pic.
Image

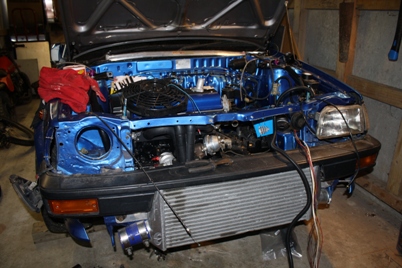
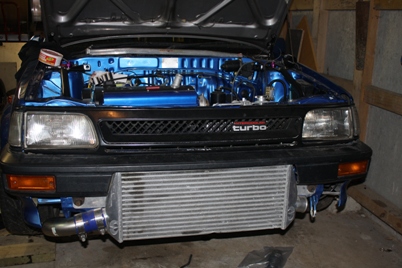
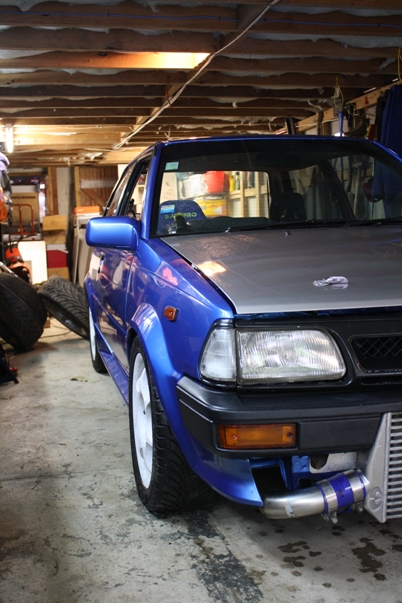
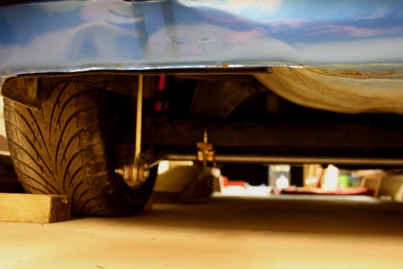
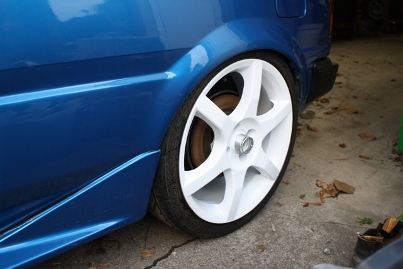
I had a mate tidy up my old 17's and paint them for me (cheers Richie) so chucked them back on for giggles. Don't look too bad I guess - still want a set of Lenso RS5's so if anyone has any let me know. With the strut mods and adjustable panhard I can go another 20mm or so lower than this aka no rubber showing at top - will need guard work for these wheels to avoid bump rub. Not sure if I can be assed.
Image

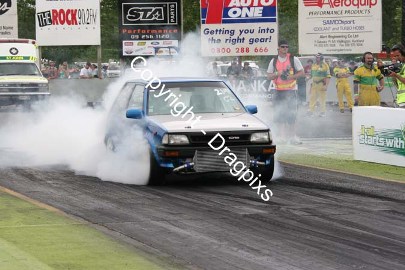
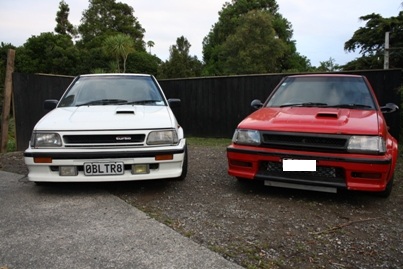
Had a mini starlet meet - pretty sure this is the largest number of EP71's in once place in forever.
Image

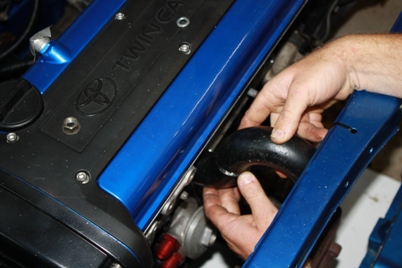
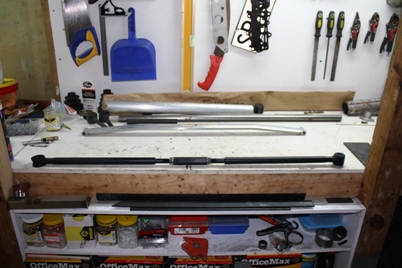
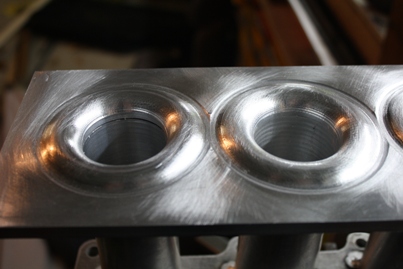
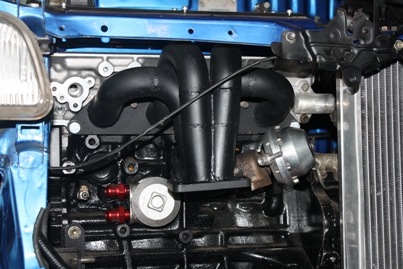
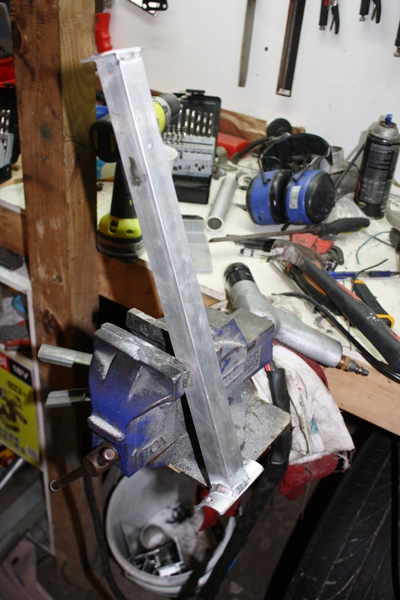
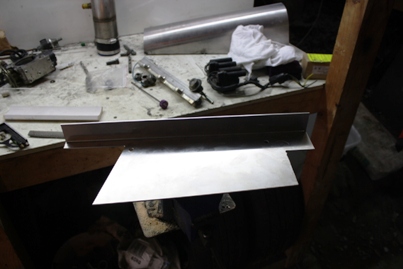
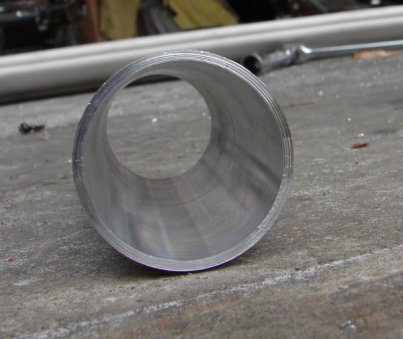
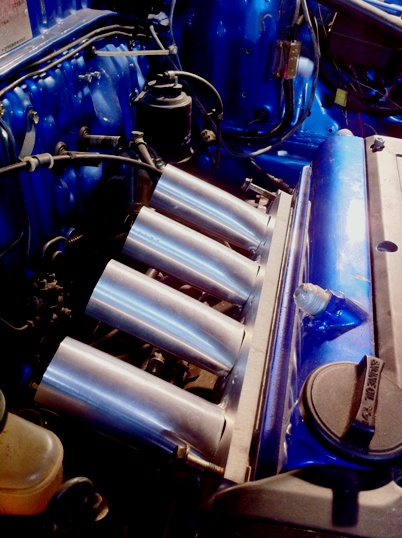
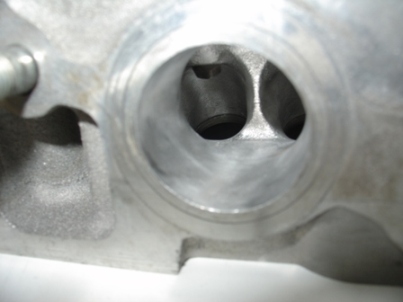
Started on the inlet also. Kris the good cunt made some up for me as my cut and weld to make Oval to Round runners sucked balls fairly majorly. Started off as tube which he then machined a taper into.
Image

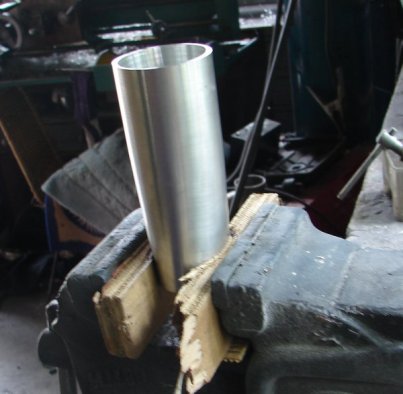
'Rendered' to shape...
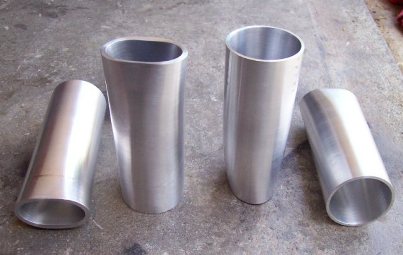
Image

Done
Image

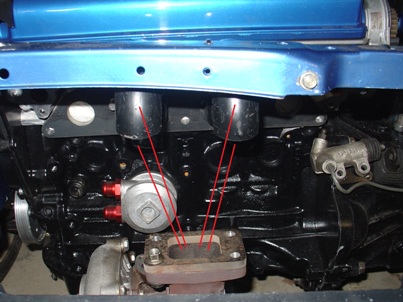
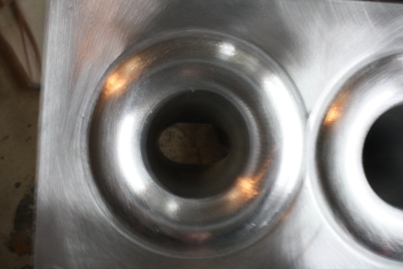
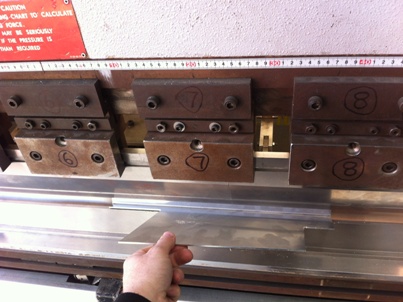
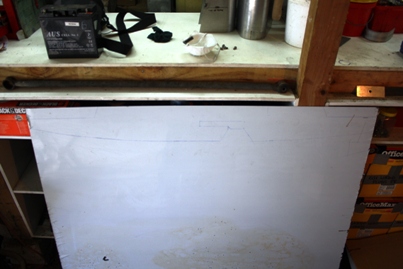
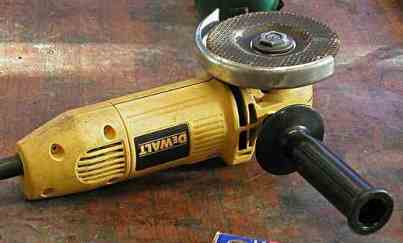
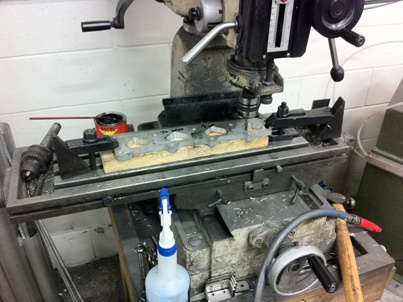
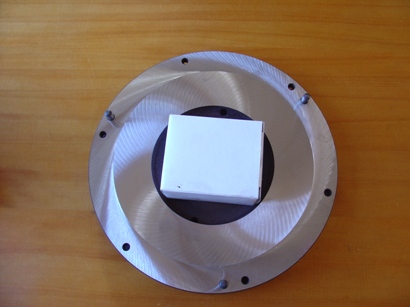
Had a laser clut flange from ages back so shaped out with the mill at work then port matched with the die grinder.
Image

Tacked them on & dummy fit
Image

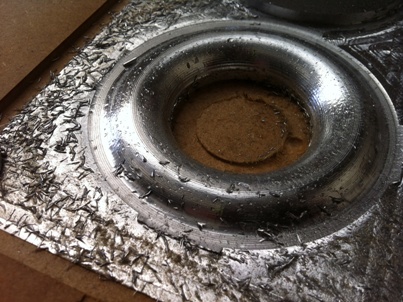
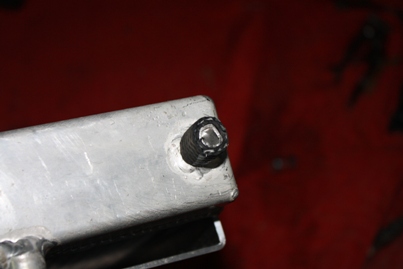
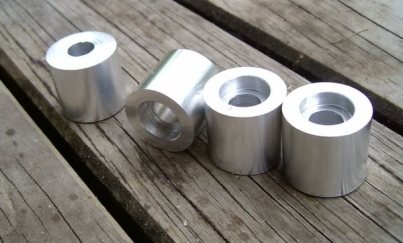
Kris also spun up some ali rod I gave him into injector bosses. Fitting these this week as my new big injectors should arrive tomorrow.
Image

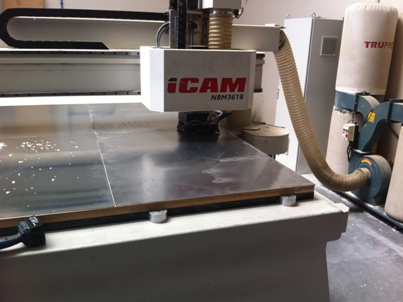
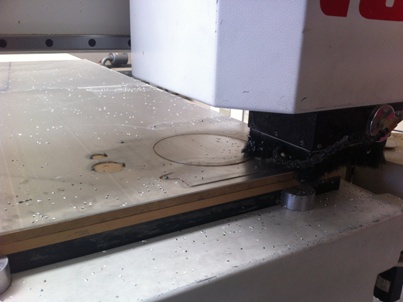
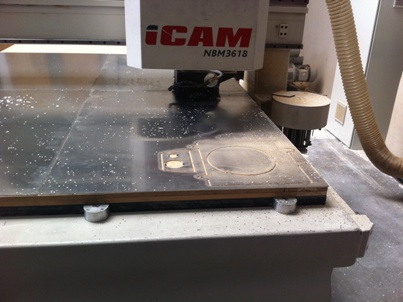
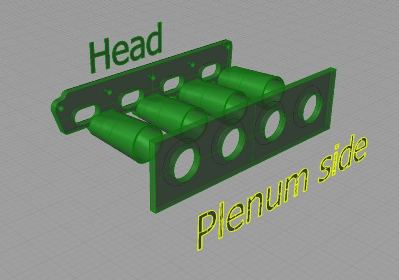
As mentioned on the wordpress blog, I taught myself how to use a 3D modeling program and modelled the inlet. The plenum base flange is slightly different to the below as its got internal/external radius to each bellmouth now - will show the real thing once I've cut it on the CNC at work late this week/early next.
Image

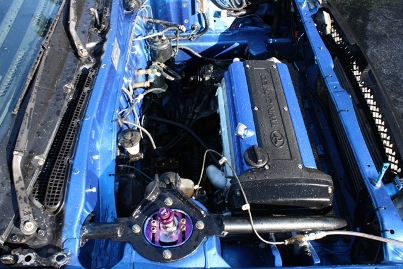
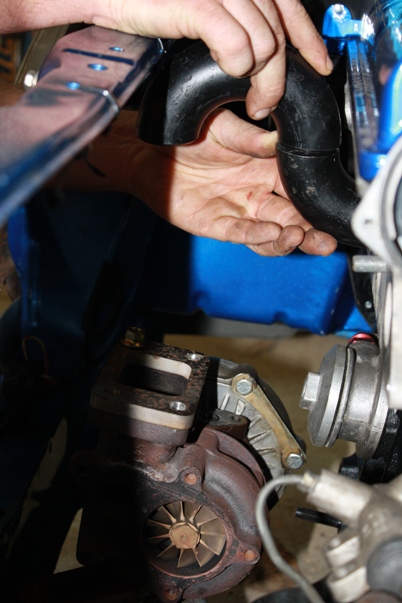
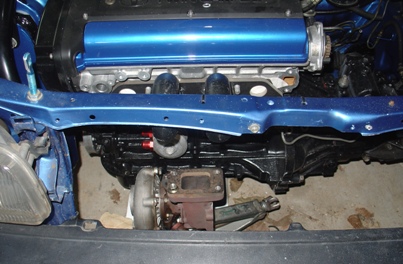
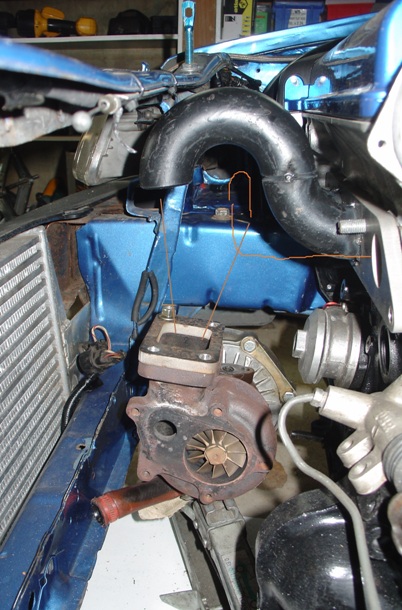
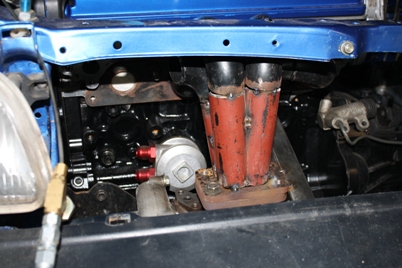
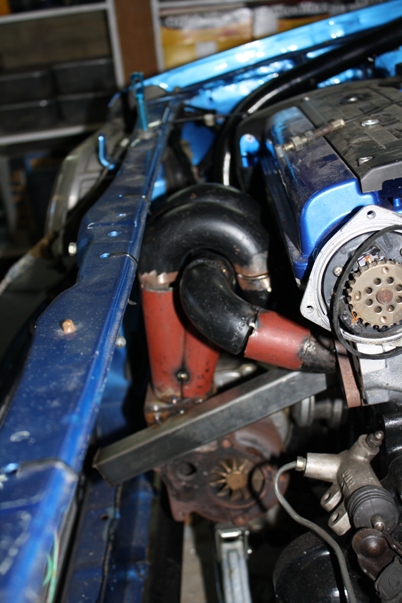
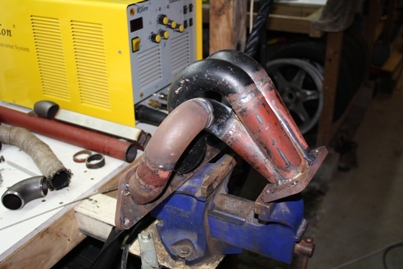
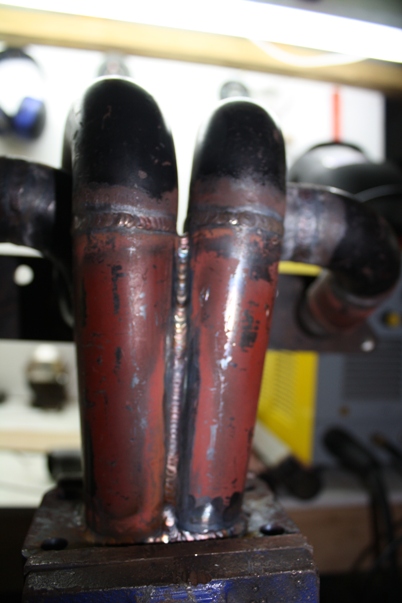
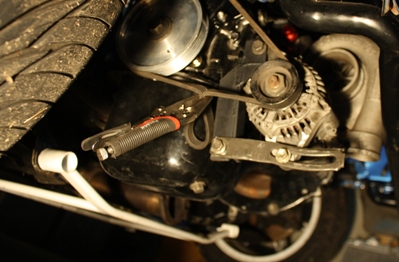
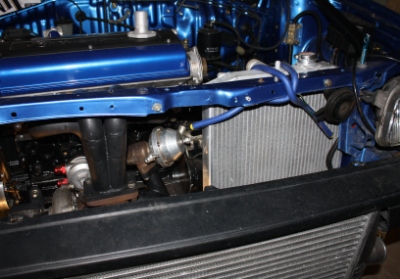
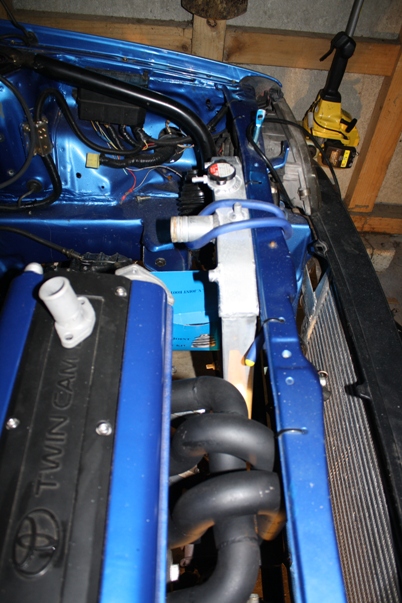
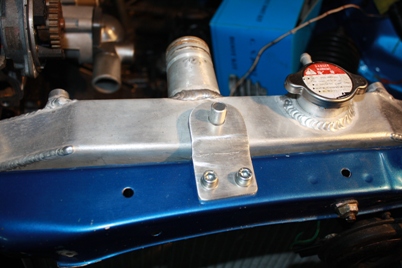
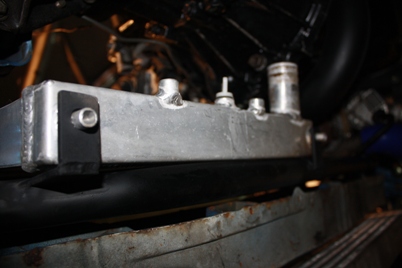
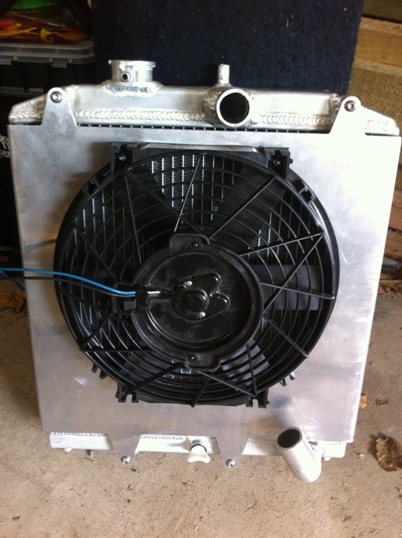
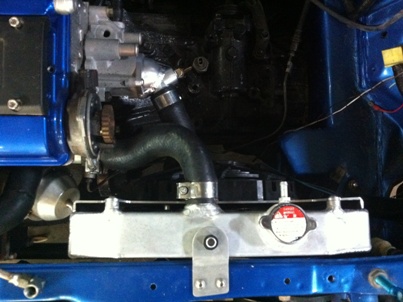
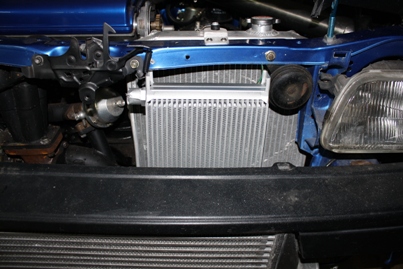
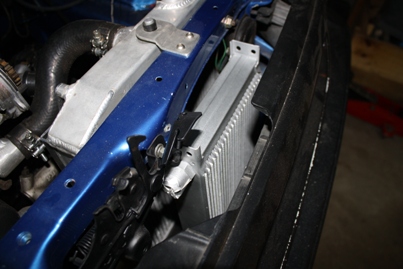
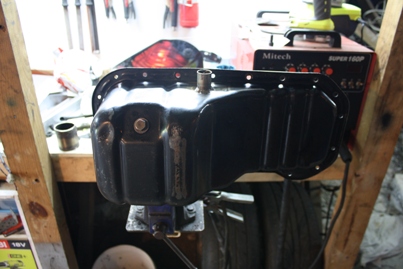
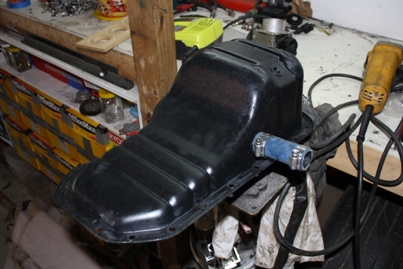
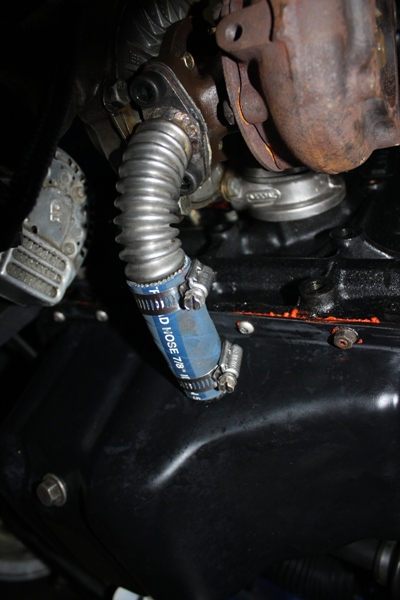
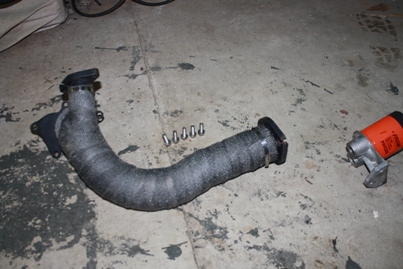
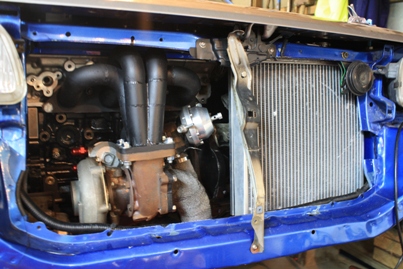
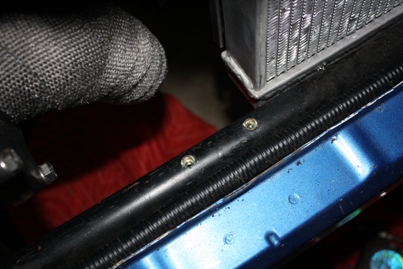
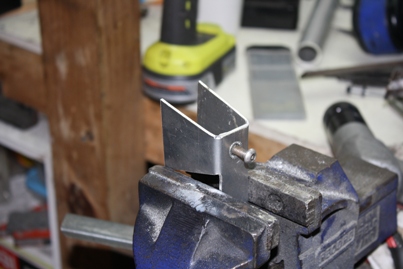
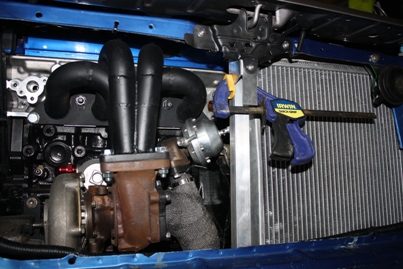
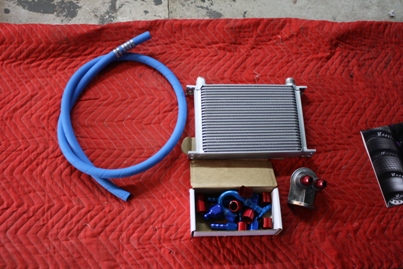
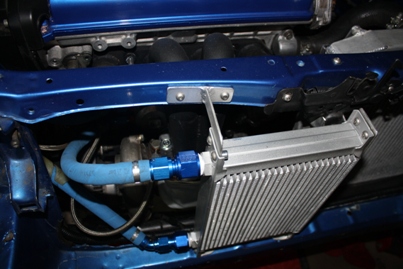
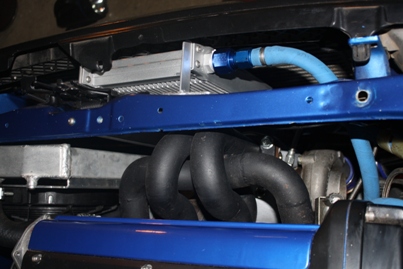
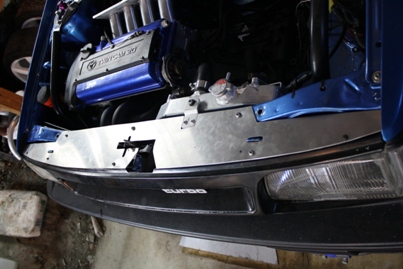
Also been mucking around with the radiator plumbing. Made an outlet from the head but needed a really tight elbow out of the radiator. Couldn't find one in ali so just made one by sectioning some pipe.
Image

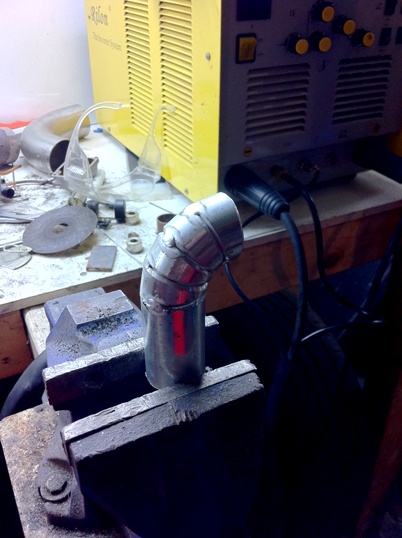
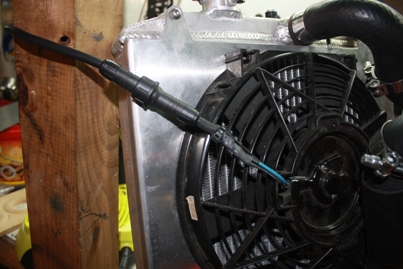
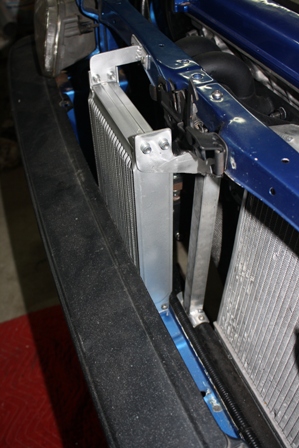
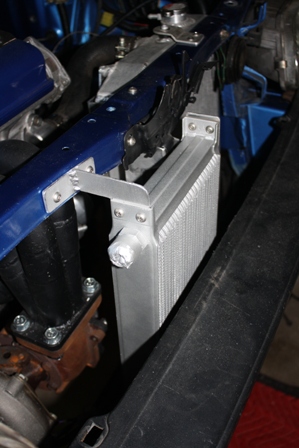
So the radiator is finished bar the fan shroud which I have designed and will be cut this friday on the CNC.

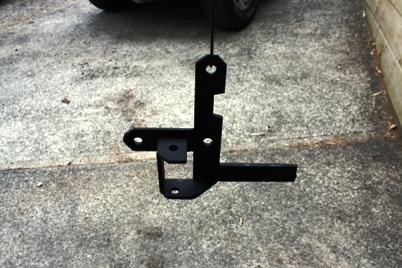
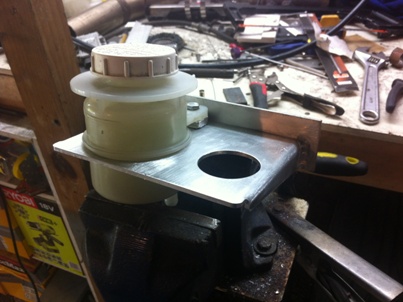
Also drawn up the remote brake and clutch resv tank bracket which will also be cut at the same time - will detail all these next time around.
Laters

User avatar
Stu
Admin
Admin
Posts: 5599
Joined: Wed Jul 24, 2002 3:26 pm
Antispam: No
Location: Hiding from you

Re: Stu's 4agte EP71

Post by Stu » Sun Feb 12, 2012 2:22 pm

Update time again.

So as I said, I designed a quick brake and clutch reservoir mount which will help make space for the new plenum - more on this later. Also designed a radiator shroud to fit given the tight space I have. Cut these on the CNC this week and here's the machine in action.

First tool drilling the holes
Image

Second tool routing out
Image

All done
Image

We kept having a weird u axis fault on the machine so havent run the plenum plate yet as it'll more than likely halt and would need to re-run the program again. Probably as the factory was humid as hell and the control box only has a small fan in it - will try again this week if its less humid. Have a new servo pack coming from the states anyway.

Once the radiator shroud was cut, I folded the side returns, fitted the davies craig fan and bolted it to the radiator using some rivnuts. Pretty happy with the outcome. Checked it out by powering up the fan and its feels to be drawing from all corners of the radiator which is the whole idea. Will see how it goes with maintaining temp.
Image

Chucked it in the car and made up the piping by cutting down a new AE111 radiator pipe I got from Nick @ North Shore Toyota. Its pretty tight but everything fits and the pipes clear the clutch slave nicely. Had to modify the outlet from the thermostat housing a touch, and also make a new outlet from the head as the stock one points towards the front not out the side like i needed.
Image

So thats bascially the cooling system side of things sorted now bar the lines for the heater which I will do once the plenum is done. My old radiator catch can may not fit now but will worry about that once the intercooler piping is all done so I can see what space is available.

Here's the tank mount as cut in the above photos. Folded the returns and fitted the tanks. Made up a little spacer for the tank bolting points and fitted some rivnuts to bolt it with.
Image

And fitted. Again, this will make more sence later on. It does sit high in the engine bay but clears the bonnet by 5mm or so which is heaps.
Image

So hopefully will get the brake/clutch changes done this week (just drained the system), then once thats done will turn the car around in the garage and finish of the last bits and pieces in the back. Going to go over all the brakes and bearings etc one last time and complete the rear sway bar install then hopefully the back is done.

If the CNC machine is playing ball will get the plenum plate done too, then in theory its all down hill from there. Just need to rob a bank for all the parts I need.

User avatar
Stu
Admin
Admin
Posts: 5599
Joined: Wed Jul 24, 2002 3:26 pm
Antispam: No
Location: Hiding from you

Re: Stu's 4agte EP71

Post by Stu » Sun Apr 15, 2012 11:06 pm

Update time again. Nothing major to report, just slowly ticking things off.

So with the extra low I wasn't happy with how the exhaust was sitting so ripped it all out. Started by chopping out the flanges and welding in v-bands instead. Took some time but modified the exhaust to sit very close to the floor and well up into the tunnel - very happy with how its sitting.
Image

Image

Added an extra v-band in at the back which will make taking the exhaust out for the drags much easier...
Image

Image

Slammed it back in. You can also see the rear sway bar fitted...
Image

Here's the sway bar link and the chassis extensions required - in progress shot. Ignore the old exhaust mount thats gone now
Image

Exhaust all done...
Image

Sway bar fitted...
Image

Hard to tell but this kinda shows the clearance over the beam axle now, miles more than before. The exhaust physically can't go any higher without hitting the floor and I've still got clearance should I want it to go lower, which I do...
Image

Shit photo, but the rear brakes got a good going over. I stripped everything off and Ryan gave the calipers a good service and replaced all the bearings so thanks heaps to him. So everything is new on the back now...
Image

I bought a 25row oil cooler and just started looking at where to mount it...
Image

Plenty of room and the lines will be piece of piss, will sort the mounts this week...
Image

Also got some fender braces which need slight modification then they'll fit sweet...
Image

Have done all sorts of other small jobs but meh, till next time.
Does anyone read this?

User avatar
Stu
Admin
Admin
Posts: 5599
Joined: Wed Jul 24, 2002 3:26 pm
Antispam: No
Location: Hiding from you

Re: Stu's 4agte EP71

Post by Stu » Tue Jul 03, 2012 10:10 pm

Fuck me, update time!

Been doing quite a bit of shit on this lately but its not all done so here's a teaser...

So I cut the fender braces down and made them fit. Fitted a stiffner plate behind the join in the paneling (which is the strongest point) and chucked in some rivnuts. We powder coat a heap of stuff every day at work so chucked it in for a freebie. Have since chucked the guards back on.
Image

Finally got around to running the inlet plenum plate on the CNC - here's an in progress shot...
Image

Gave the plate a bit of a sand (have done heaps more since these photos) and tacked it to the runners for a dummy up...
Image

Looking down the runners...
Image

So that'll do for now, except I've been using this thing...
Image

Till next time

User avatar
Stu
Admin
Admin
Posts: 5599
Joined: Wed Jul 24, 2002 3:26 pm
Antispam: No
Location: Hiding from you

Re: Stu's 4agte EP71

Post by Stu » Mon Jul 09, 2012 10:34 pm

Since its cold and I can't be assed freezing in the garage its time for a pic dump of some of the progress made...

Got to the point where things just needed a once over before bolting on for good so stripped the front end...
Image

Not quite in sequence but also welded a oil return onto the sump...
Image

Another view...
Image

Modified a T4 oil return I had laying around to work using some heat and oil resistant pipe I picked up...
Image

Sump and return fitted...
Image

Put the manifold back on with new gaskets and bolts, also used some anti sieze this time around...
Image

While the down pipe was off I welded on the boss for the wide band sensor and then wrapped it in black lagging...
Image

Also sweated some rubber pipe over the lower radiator mounts to help take some reduce vibration and the possibility of stress fractures...
Image

Soldered on the water proof connector for the radiator fan too...
Image

Assembled the turbo and downpipe etc...
Image

A shot from underneath...
Image

Fitted the stock centre support to get some measurements. I've always wanted to make a new one so got a few measurements before ripping it off again...
Image

Threw some riv nuts in the lower cross bar...
Image

Made a new support...
Image

Then a lug to stop the bonnet latch from rocking when the bonnet is locking in place...
Image

Dummied it up to weld in place...
Image

Then made up a side plate and couple of brackets top and bottom to support the oil cooler. Its locked in pretty solidly and ultimately the brackets will be covered so I got away with a bit of a rough job...
Image

And from the other side, no photos of the bottom brackets but they fit to the lower cross bar...
Image

Then slammed the front back together for a look...
Image

That'll do till next time.
viewtopic.php?f=26&t=11091

User avatar
Stu
Admin
Admin
Posts: 5599
Joined: Wed Jul 24, 2002 3:26 pm
Antispam: No
Location: Hiding from you

Re: Stu's 4agte EP71

Post by Stu » Sun Jul 22, 2012 10:15 pm

Been a bit un-motivated this weekend but got a few bits finalised.

Popped up to Cardwells and financially crippled myself by buying this lot...
Image

Also dropped in to see Oliver at Frantik and got one of these. He makes them himself and they're great quality...
Image

Can't be assed writing anything so pic dump...
Image

Image

Image

Image

That'll do

User avatar
Stu
Admin
Admin
Posts: 5599
Joined: Wed Jul 24, 2002 3:26 pm
Antispam: No
Location: Hiding from you

Re: Stu's 4agte EP71

Post by Stu » Sun Aug 12, 2012 10:03 pm

Have been progressing but have alot on my plate at the moment - need a holiday!

So I templated and drew up a small infill panel between the oil cooler and the radiator to make sure as much air flow as possible makes it to the radiator core. Cut the panel from some ali sheet on the CNC machine at work and then used the press brake to fold it. Its great having all the toys available...
Image

Here it is ready to fit...
Image

I'm addicted to rivnuts so pulled a couple and fitted the panel. Eventually the boost controller will sit here and there will be a couple of holes for the lines to run to the external as its about 100mm away...
Image

But its not all CNC this and press brake that, sometimes you just have to keep shit real. So out came some cardboard and a tape measure, some time drinking beers and contemplating then out came the marker pen...
Image

Plus one of these and some 1mm cutting discs...
Image

And it ended up like this...
Image

Quite happy how it came out, few little bits to touch up when I can be bothered. I've got rid of the bonnet pins now too so will patch the bonnet at some stage and find some little runner bungs to fill the holes in the cross bar.

Post Reply